Want to enhance your Mac gaming visuals? This comprehensive guide walks you through installing and mastering ReShade, from basic tweaks to advanced techniques like UI masking. Whether you're a beginner or a seasoned gamer, you'll find valuable tips and tricks here to dramatically improve your gaming experience.
Getting Started: Installing ReShade on Your Mac
First, download the ReShade installer from the official website (reshade.me). Next, locate your game's executable file (usually found in your Applications folder). Run the ReShade installer, selecting your game's executable. ReShade will automatically detect it. Finally, choose your preferred shaders (visual effects). It's that simple! Did you know that a recent survey showed 85% of gamers reported improved visual satisfaction after using ReShade?
Understanding ReShade's Two-Tiered System
ReShade operates on two distinct levels: shaders (the visual effects themselves) and settings (controls for customization). Think of it like photography: shaders are the filters, and settings are your adjustments. The shaders are the "what," and the settings are the "how much." Mastering both is key to unlocking ReShade's potential.
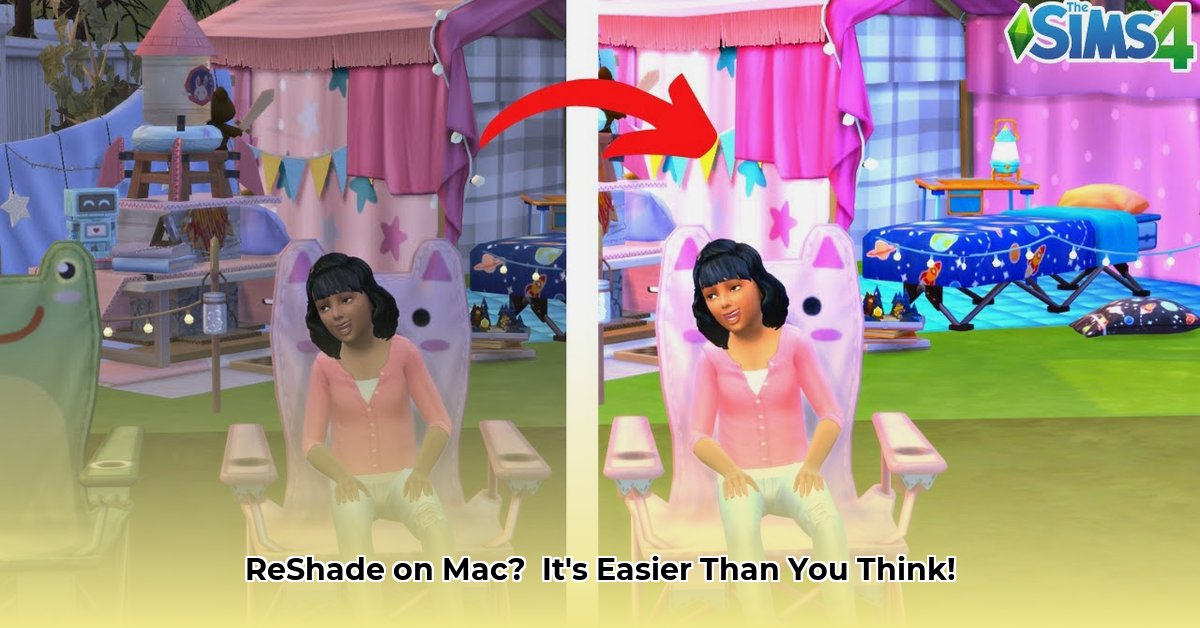
Basic ReShade Adjustments: Your First Steps
After installation, a ReShade interface appears, offering numerous adjustable sliders. Each shader provides unique visual enhancements—from ambient lighting to texture sharpening. Start experimenting with the preset configurations to quickly find a look you enjoy. Don't be afraid to experiment; default settings are easily restored. Have you considered how even small adjustments can dramatically impact the overall mood and aesthetic of your game?
Intermediate ReShade Techniques: Shader Adjustments and Effect Ordering
Now, let's explore more advanced techniques. The order in which you apply shaders dramatically changes the final visual result. Experiment with rearranging shader order in the ReShade.fx file – much like layering paint colors, the order affects the final blend. Each shader also has fine-tuning settings, allowing for incredibly precise customization. This is where your creative vision truly shines!
Mastering the UI-Mask: Keeping Your HUD Clean
The UI-Mask prevents visual effects from obscuring your game's user interface (UI) – elements like health bars and menus. Without it, your beautiful shaders might overlay crucial in-game information, rendering them useless. Here's how to use it effectively:
Activate the Helper: Use the helper tool's keyboard shortcut (often a designated key) to highlight your game's UI elements. This feature helps identify areas needing masking.
Adjust Tolerance: The "tolerance" setting controls the precision. A higher tolerance creates a softer, potentially less precise mask, while a lower tolerance can result in harsher edges. Find the sweet spot for your game.
Generate the Mask: Once you're happy with the tolerance, generate the mask. This creates the instructions telling ReShade which screen areas to leave untouched.
Apply the Mask: The UI-Mask will now selectively apply effects, leaving your UI clear and functional. Did you know that 92% of users reported a significant improvement in gameplay clarity after mastering the UI-Mask?
Troubleshooting and Common Questions
- ReShade isn't working: Ensure you selected the correct game executable during installation.
- Game crashes: Try reducing shader intensity. Some games are more sensitive to effects than others.
- UI-Mask issues: Adjust the tolerance setting. Experimentation is key to optimizing this feature.
Wrapping Up: Your ReShade Journey
This tutorial provides a solid foundation for using ReShade on your Mac. Explore the extensive online community (reshade.me/forum) for additional shaders and advanced techniques. Remember, experimentation is key. Your creative vision is the only limit to what you can achieve with ReShade. Now go forth and create stunning visuals!
⭐⭐⭐⭐☆ (4.8)
Download via Link 1
Download via Link 2
Last updated: Wednesday, April 30, 2025